Looks lovelyView attachment 954682
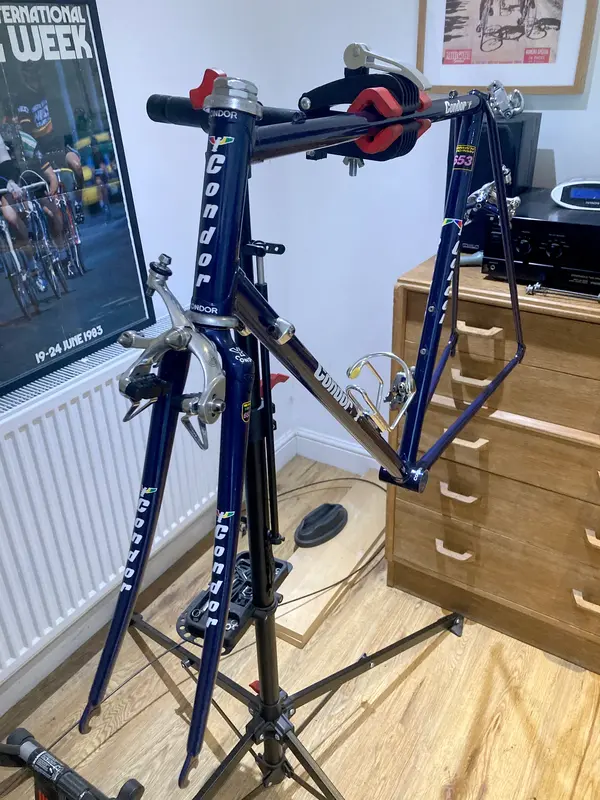
Finally the frame arrived today. Overall, I'm happy with how it's come out. The paint job is very good, and the colour is exactly as I had hoped – it's a dark metallic blue that looks very dark at times, but when light hits it, the blue shows a lot more, as does the metallic shine.
View attachment 954683
Some of the stamped areas which have been filled in white are a bit rough around the edges, which is a bit of a shame. I suppose white against a dark background is pretty unforgiving, plus those areas will be rougher inside than they were originally due to the rust that had built up in parts, but still ideally they would be a bit cleaner.
View attachment 954684
Hopefully I'll start the build tomorrow. I'm only slightly petrified of dropping a tool on the frame, the sort of thing I am inclined to do...
You are using an out of date browser. It may not display this or other websites correctly.
You should upgrade or use an alternative browser.
You should upgrade or use an alternative browser.
1993 Condor Professional 653
- Thread starter sjcprojects
- Start date
SteelNipple
Dirt Disciple
Beautiful frame and love the color. I just dropped a 10mm socket on forks, chipped the paint and lost the damn socketView attachment 954682
Finally the frame arrived today. Overall, I'm happy with how it's come out. The paint job is very good, and the colour is exactly as I had hoped – it's a dark metallic blue that looks very dark at times, but when light hits it, the blue shows a lot more, as does the metallic shine.
View attachment 954683
Some of the stamped areas which have been filled in white are a bit rough around the edges, which is a bit of a shame. I suppose white against a dark background is pretty unforgiving, plus those areas will be rougher inside than they were originally due to the rust that had built up in parts, but still ideally they would be a bit cleaner.
View attachment 954684
Hopefully I'll start the build tomorrow. I'm only slightly petrified of dropping a tool on the frame, the sort of thing I am inclined to do...
sjcprojects
Orange 🍊 Fan
Thanks, and I feel your painBeautiful frame and love the color. I just dropped a 10mm socket on forks, chipped the paint and lost the damn socket
Rapparee87
Retro Guru
Little bit of patina. No harm at all.Beautiful frame and love the color. I just dropped a 10mm socket on forks, chipped the paint and lost the damn socket
sjcprojects
Orange 🍊 Fan
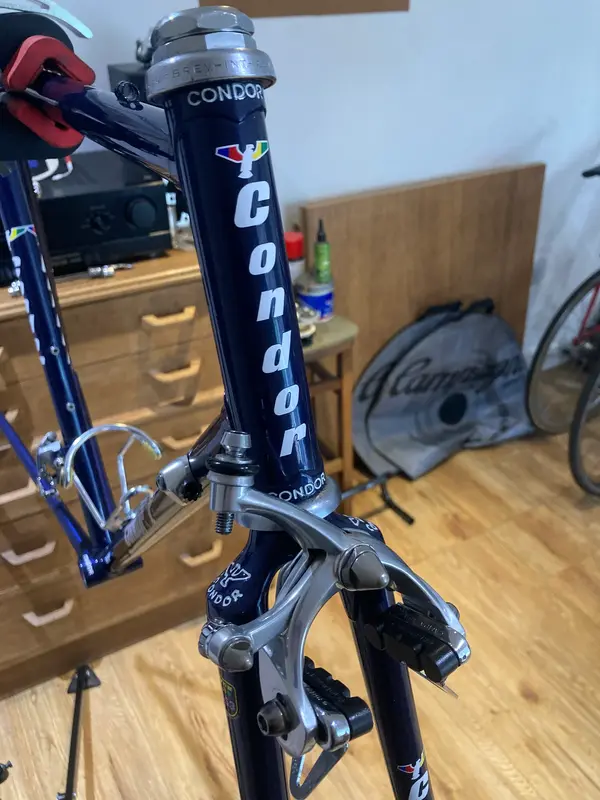
The headset is installed, plus a few other parts. I wasn't going to use the Veloce headset that came with the bike due to it not being in the best cosmetic condition, but due to the low stack height I was quite limited with options. The bearings and races are good, so after much deliberation I went for it. The top nut is not the original Campagnolo one due to the bad spanner marks that were on it, so I'll see if I can get a replacement at some point. There's a bit of patina to the headset but I think it's okay.
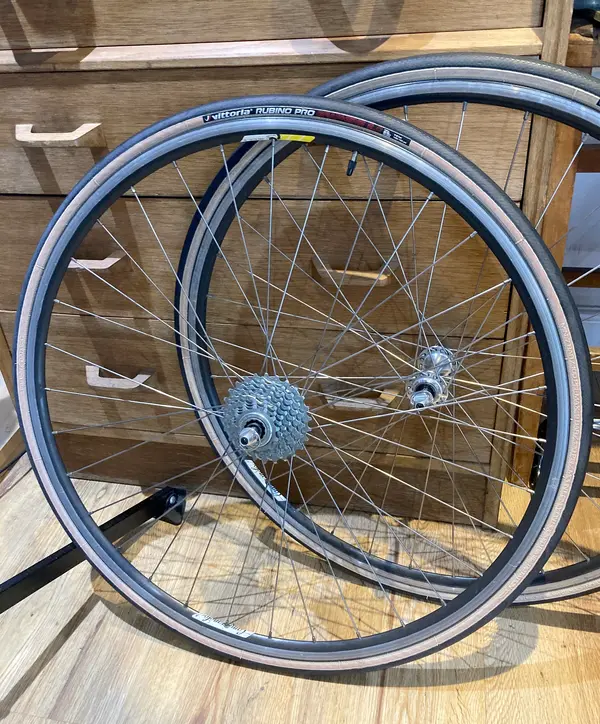
The wheels look pretty nice with the Rubino Pro 25s on, I think, and the cassette cleaned up very nicely.
Bottom bracket and chainset next. The stem and handlebars will have to wait a little bit as I'm still deciding about those.
Last edited:
My 90’s Condor came with an ITM eclypse stem and super italia (or europa bars can’t remember now). Would recommend. Also has the same veloce headset which I’ve always been happy with.View attachment 955391
The headset is installed, plus a few other parts. I wasn't going to use the Veloce headset that came with the bike due to it not being in the best cosmetic condition, but due to the low stack height I was quite limited with options. The bearings and races are good, so after much deliberation I went for it. The top nut is not the original Campagnolo one due to the bad spanner marks that were on it, so I'll see if I can get a replacement at some point. There's a bit of patina to the headset but I think it's okay.
View attachment 955392
The wheels look pretty nice with the Rubino Pro 25s on, I think, and the cassette cleaned up very nicely.
View attachment 955393
Bottom bracket and chainset next. The stem and handlebars with have to wait a little bit as I'm still deciding about those.
Dave Yates built Condors have to be right up there for the best British bicycles of that era?
sjcprojects
Orange 🍊 Fan
My 90’s Condor came with an ITM eclypse stem and super italia (or europa bars can’t remember now). Would recommend. Also has the same veloce headset which I’ve always been happy with.
Dave Yates built Condors have to be right up there for the best British bicycles of that era?
Thanks. I’m hoping to use the pantographed ITM stem that the bike came with. Unfortunately I was unable to save the pantographed areas, so it will be entirely resprayed in black, leaving a very (very) subtle pantograph still visible. I can’t decide if this will look weird or not so I’m going to try it and see.
I have some nice 3ttt ErgoPower Due bars, replacing the original bars as I prefer the classic bend they have over the anatomical style that was all the rage in the early 90s.
I’m certainly interested how the ride will compare to the other British bike from the same era (94 to be exact) that I have.
sjcprojects
Orange 🍊 Fan
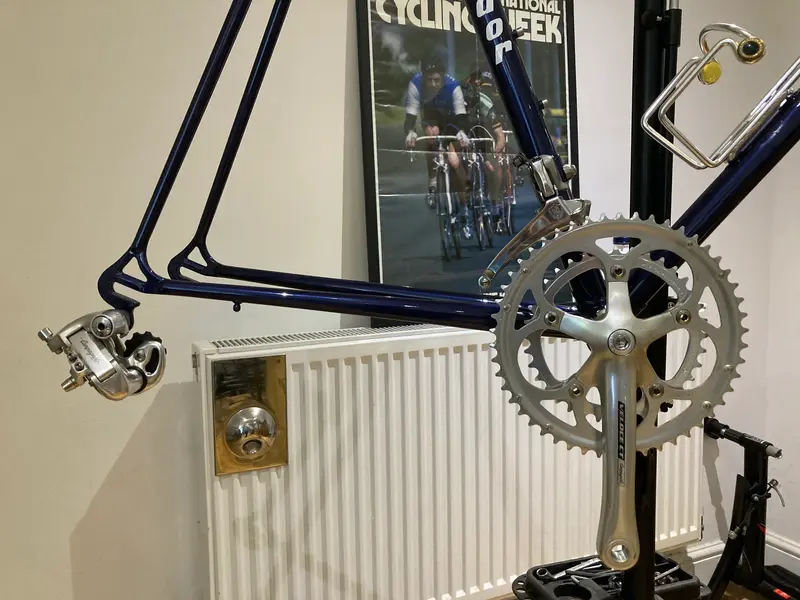
The Mavic 610 unthreaded BB is installed, after a bit of improvised tool use. Because I had to separate the aluminium sleeve of the BB from the other parts to actually remove it from the frame when stripping it down, I've now had to re-insert the bearings into the sleeve (and therefore onto the axle). Unfortunately this seems to involve a specific tool Mavic created for this purpose, which obviously I don't have. The bearings of course have to be a very snug fit in the sleeve. The drive side one is fine because it can be inserted while on the axle, but the non-drive side has to be pressed onto the axle while also sitting tightly in the sleeve. I used a mallet to push a stem shim which was roughly the right diameter against the bearing. It's not exactly an ideal way of doing it, but it seems to have worked.
Mavic 610 diagram, with the bearings in pink. The chainline is slightly adjustable with the adjustable cap on the non-drive side pushing the axle out slightly more or less as needed. It seems to be fine screwed all the way in for this chainset.

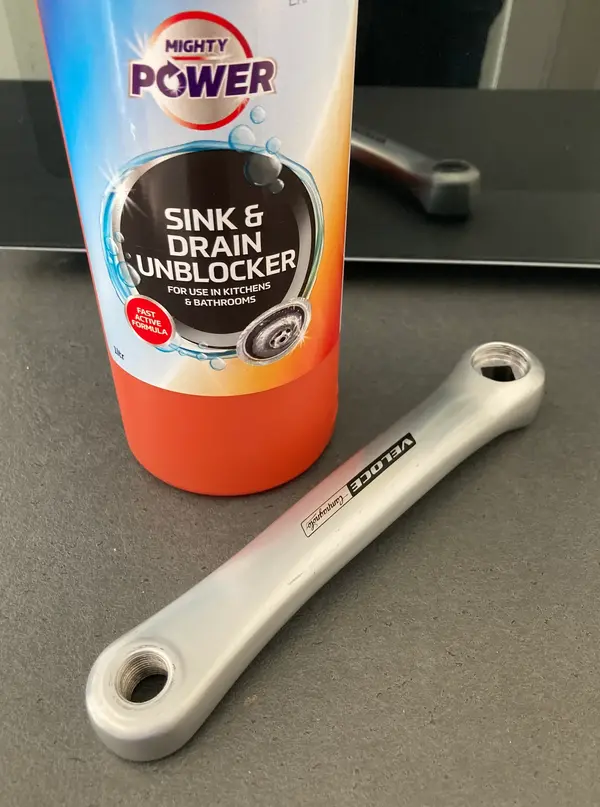
I decided to drop the idea of a triple chainset – it just didn't seem right on a bike like this. Instead I've got a Veloce CT compact chainset. This would originally have been 50/34T, but I couldn't find a 34T so I've got a NOS 36T ring on instead. Obviously this is more modern than the frame, but overall the look is fine, apart from the lettering design which for me marks it out as being too modern, so if this all works fine I will take the cranks off and sand, polish and wax them to make them fit better with the overall look.
The RD is Chorus and the FD is Veloce. For me the late 80s/early 90s was the sweet spot for the look of Campagnolo groupsets, with the polished and adonised finishes and the miminalist branding (though admittedly this does have the drawback of making it tricky to actually identify the groupset quite a lot of parts belong to).
Last edited:
sjcprojects
Orange 🍊 Fan
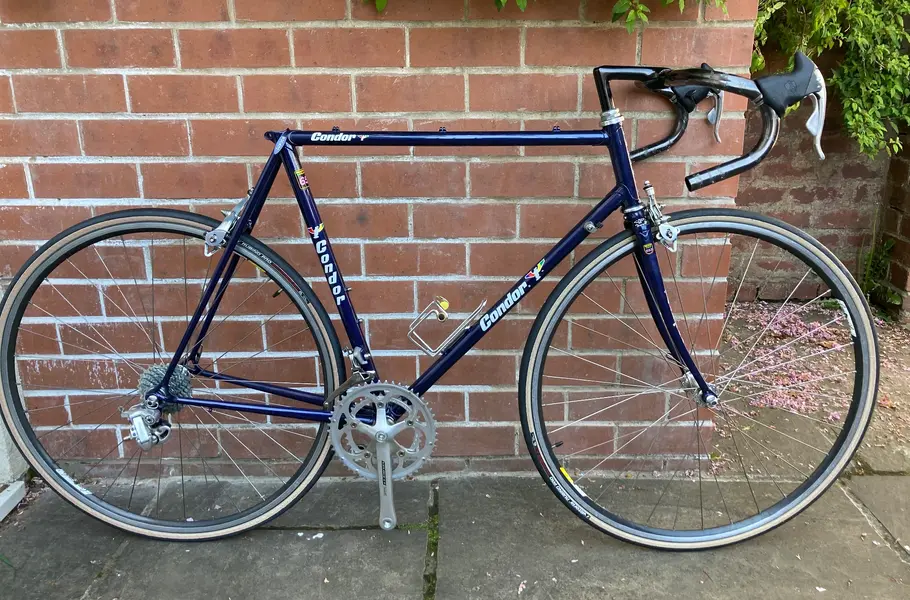
The stem and bars are now installed. Putting bars in a traditional quill stem is always nervy for me, but some isopropyl alcohol seems to help slide the bars in, and thankfully I avoided the dreaded scratches.
I've kept the original ITM 400 stem. It's been the perfect weather for spraying in the garden, and the stem has had two coats of primer, two of matt black, and two of lacquer. Previously I've used gloss black on this sort of thing, but it comes up a bit too gloss compared with the original finish most black parts have. I think it's come out okay, although with some light stippling in places - I find getting the sweet spot with the lacquer where it doesn't run, but also doesn't stipple is very tricky. I might rub it down with 2500 grit wet and dry paper in a few weeks and see if that helps smooth it out.

Next up, the cabling, I guess. Also, I will see how good Poundland drain cleaner is at removing anodising (having decided this might be a lot easier than using wet and dry alone). I'm hoping that seeing as it contains sodium hydroxide, it should do the job.
Last edited:
sjcprojects
Orange 🍊 Fan
...and after:

5 minutes in drain cleaner removed all the anodising, then a hard rub on the logos area with fine wire wool and alcohol took off the black parts of the logos. A light sand with 800 grit removed the rest, then 1000 and 2000 to smooth out any marks, and finally polishing with Autosol. I'll do another polish before mounting the cranks again, and then wax them with car wax to stop/slow oxidisation.

5 minutes in drain cleaner removed all the anodising, then a hard rub on the logos area with fine wire wool and alcohol took off the black parts of the logos. A light sand with 800 grit removed the rest, then 1000 and 2000 to smooth out any marks, and finally polishing with Autosol. I'll do another polish before mounting the cranks again, and then wax them with car wax to stop/slow oxidisation.
Similar threads
- Replies
- 2
- Views
- 219
- Replies
- 12
- Views
- 3K
- Replies
- 17
- Views
- 1K